Tips for Keeping Your Lights in Perfect Condition for Years to Come
Tips for Keeping Your Lights in Perfect Condition for Years to Come
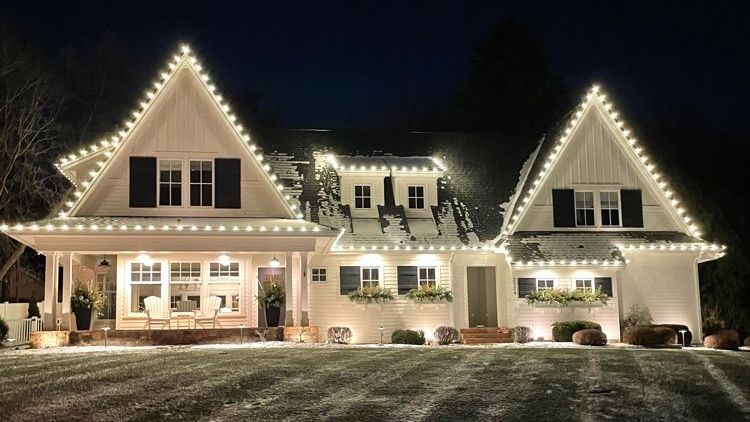
Holiday lights are more than just decorations—they’re part of the cherished memories of the season. Keeping your lights in perfect condition not only saves you money but also ensures that your holiday displays shine brightly year after year. Here are expert tips to help you maintain and store your lights for lasting brilliance.
1. Test Your Lights Before Installation
Before you hang your lights, check each strand for burned-out bulbs, frayed wires, or loose connections. Testing your lights saves time and prevents frustrating surprises once they’re installed. Plug them in to ensure they work, and replace damaged bulbs with the correct wattage.
2. Handle Lights with Care During Installation
Avoid tugging or stretching light strands, as this can damage the wiring. Use clips designed for gutters or shingles to secure your lights without causing harm to your home or the strands themselves. Improper installation can lead to broken bulbs or compromised wiring.
3. Protect Against Weather Damage
Outdoor lights are exposed to harsh elements, from rain to snow to extreme cold. Use weatherproof and outdoor-rated lights and extension cords to prevent damage. For added protection, wrap connections with electrical tape and keep plugs elevated to avoid water damage.
4. Invest in LED Lights
Switching to LED lights is a wise investment for longevity. LEDs are more durable, use less energy, and are less prone to overheating compared to incandescent bulbs. They also have a significantly longer lifespan, making them a cost-effective choice over the years.
5. Use Timers for Energy Efficiency
Timers not only make it easy to manage your holiday lights but also reduce wear and tear. By automating when your lights turn on and off, you’ll save energy and extend their lifespan. This is especially useful for outdoor displays where manual operation might be inconvenient.
6. Perform Regular Maintenance
Throughout the holiday season, check your lights for any issues such as burned-out bulbs, sagging strands, or damaged wiring. Promptly replacing faulty bulbs and fixing problems prevents further damage and ensures your display looks great all season.
7. Store Lights Properly After the Holidays
When the holidays are over, taking down your lights carefully is just as important as putting them up. Avoid yanking them off hooks or nails, as this can damage the wiring. Instead, detach them gently and wrap them around a storage reel or piece of cardboard to prevent tangling.
8. Label and Organize
Label your light strands by type, color, or location (e.g., "roofline," "tree," "porch") before storing them. This organization will save you time and effort next season when you’re ready to decorate again.
9. Keep Lights in a Dry, Cool Place
Store your lights in a dry, temperature-controlled environment to prevent damage from moisture or extreme heat. Avoid storing them in damp basements or uninsulated attics, as these conditions can cause rust, corrosion, or melting.
10. Upgrade Your Storage System
Invest in specialized storage solutions such as light storage reels, plastic containers with dividers, or fabric storage bags. These tools keep your lights neatly wound and safe from dust and debris.
11. Replace When Necessary
Even with the best care, lights eventually wear out. If you notice consistent issues with a strand or have safety concerns, it’s best to replace it. Modern lights, especially LEDs, offer improved performance and energy efficiency, making them a worthwhile upgrade.
FAQs About Maintaining Holiday Lights
Q1: How often should I replace bulbs?
Replace burned-out bulbs as soon as possible to prevent excess strain on the remaining bulbs in the strand. This extends the life of the entire set.
Q2: Can I leave my outdoor lights up year-round?
It’s best to take down your lights after the holiday season to prevent weather-related damage and prolong their life. Continuous exposure to the elements can reduce their lifespan.
Q3: What’s the safest way to clean holiday lights?
Wipe your lights with a soft, damp cloth to remove dirt and dust. Avoid using harsh chemicals or submerging them in water, as this can damage the wiring.
Q4: How can I prevent tangling during storage?
Wrap your lights around a spool, piece of cardboard, or specialized storage reel. Secure the ends with twist ties or zip ties to keep everything in place.
Q5: Should I hire professionals for maintenance?
For large or intricate displays, hiring professionals like Jingle Bulbs Christmas Lighting ensures your lights are installed, maintained, and removed with care, extending their lifespan.
Keeping your holiday lights in perfect condition requires a little extra effort, but it’s well worth it for the beauty and joy they bring. By following these tips, you’ll enjoy a flawless display year after year. For a professional touch, contact Jingle Bulbs Christmas Lighting for expert installation, maintenance, and takedown services. Your lights will shine brighter than ever!